Switching your mobile phone from Android to iPhone can be an exciting experience, but one of the main concerns is how to transfer all your important data, like contacts, messages, photos, and apps, to your new device.
Whether you’re upgrading to the latest iPhone or making the switch for the first time, transferring data between two different devices may seem daunting.
Fortunately, it doesn’t have to be. With the right methods, you can seamlessly move your files from Android to iPhone. Whether you’re setting up your iPhone for the first time or already have it running, we’ll explore three reliable methods to get your data moved over without a hitch.
By following these instructions, you can ensure that all your important files make the journey from Android to iPhone intact. Here are the methods that we’ll discuss
- Transfer Data via Move to iOS: Use the Move to iOS app to move contacts, messages, photos, and Google accounts during the initial iPhone setup.
- Transfer Data Using Google Account Sync: Sync contacts, calendar events, and emails through Google without resetting your iPhone, ideal for already set-up devices.
- Use Google Drive for Additional File Transfers: Upload files like photos, videos, and documents to Google Drive and download them on your iPhone.
Ready to learn more? Let’s get started!
Table of Contents
Essential Preparation for Transferring Data from Android to iPhone
To ensure your data transfer from Android to iPhone is as smooth as possible, here are a few essential preparation steps:
1. Ensure Your Phones Are Charged
The data transfer process can be intensive, depending on the amount of data you’re moving. This often causes both your Android and iPhone to drain their batteries more quickly than usual. It’s a good idea to have both phones charged to at least 75%, but preferably fully charged.
Additionally, it’s important to monitor your phone’s battery life to ensure it doesn’t get drained during the transfer process.
This way, you won’t risk running out of battery mid-transfer, which could cause disruptions or incomplete data migration.
2. Connect to a Stable Wi-Fi Network
Since you’ll be transferring data wirelessly, a reliable Wi-Fi connection is crucial. An unstable or weak connection could cause the transfer to take longer than expected, or worse, fail altogether.
Ensure that both your Android and iPhone are connected to a fast and stable Wi-Fi network for the most efficient transfer process.
3. Check Available Storage on Your iPhone
Before beginning any data transfer, it’s essential to confirm that your iPhone has enough storage to accommodate all the files from your Android phone. Photos, videos, and large apps can consume a significant amount of space.
If your iPhone’s storage is limited, you may want to organize and clean up unnecessary files on your Android phone before starting the transfer. This could include deleting duplicate or blurry photos, old files, and unused apps.
You can use apps like Gemini Photos on Android to help identify and remove duplicate or poor-quality images, freeing up storage space for the transfer.
Methods to Transfer Data from Android to iPhone
Having discussed the essential preparation from Android to iPhone, let’s have a closer look at the methods to do so.
Method 1: Transfer Data via Move to iOS
Apple’s Move to iOS app is one of the easiest ways to transfer your data from Android to iPhone. The app allows you to transfer essential data such as contacts, messages, photos, videos, web bookmarks, and even your Google accounts.
However, one thing to note is that Move to iOS can only be used during the initial iPhone setup. If you’ve already completed the setup and want to use this method, you’ll need to reset your iPhone to factory settings.
Steps to Transfer Data Using Move to iOS:
Step 1: Reset Your iPhone (If Already Set Up)
If you’ve already set up your iPhone, you’ll need to reset it to access the Move to iOS feature. To do this, go to Settings > General > Reset > Erase All Content and Settings.
After the reset, your iPhone will restart, and you’ll be taken to the iOS Setup Assistant.
Step 2: Start the iPhone Setup Process
During the iPhone setup, you’ll be guided through a few basic steps such as connecting to a Wi-Fi network, creating a passcode, and agreeing to Apple’s terms and conditions. Continue until you reach the Apps & Data screen.
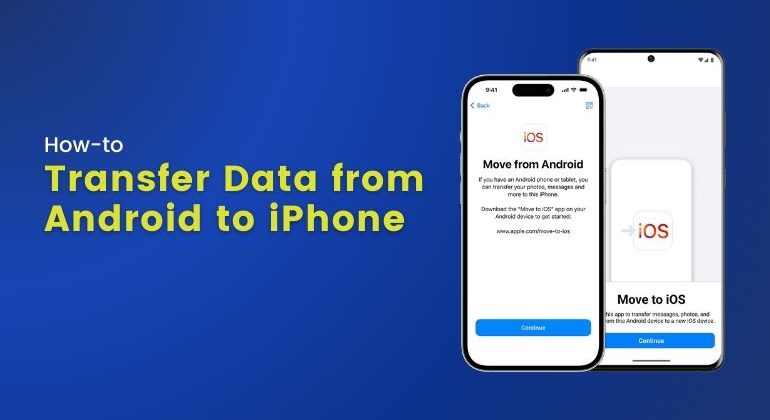
Step 3: Select ‘Move Data from Android’
On the Apps & Data screen, select the Move Data from Android option, then tap Continue. You will see a one-time code appear on your iPhone screen.
Step 4: Download the Move to iOS App on Your Android Device
On your Android phone, head to the Google Play Store and download the Move to iOS app. Open the app, agree to the terms and conditions, and grant it access to your files and location when prompted. When you reach the Find Your Code screen, enter the one-time code displayed on your iPhone.
Step 5: Pair Devices and Select Data to Transfer
Once you’ve entered the code, the two phones will establish a connection, and you’ll be prompted to select the data you want to transfer. This can include contacts, message history, photos and videos, calendar information, Google accounts, and more. Once selected, the transfer process will begin.
Step 6: Let the Transfer Complete
Depending on how much data you’re transferring, this process could take anywhere from a few minutes to over an hour. Make sure to leave both phones untouched during the transfer to avoid any interruptions.
The Move to iOS app is a reliable way to migrate most of your important data, but keep in mind that certain items, like apps and music files, may not be transferred and will need to be downloaded manually from the App Store or synced via iTunes.
Method 2: Transfer Data Using Google Account Sync
If you’ve already set up your iPhone and prefer not to reset it, you can use your Google account to transfer data.
This method works well if you have cloud backups enabled on your Android device, and it’s especially useful for transferring contacts, calendar events, and emails.
Steps to Transfer Data Using Google Account Sync:
Step 1: Enable Google Sync on Android
On your Android phone, open the Settings app and locate the Google tab. Tap on Backup and toggle on the categories you want to sync (e.g., Contacts, Calendar, Gmail). You can double-check what is being backed up by expanding the Backup details list.
Make sure the backup process completes before moving on to the next step. This may take some time depending on the size of your data.
Step 2: Sync Google Account on iPhone
On your iPhone, go to Settings > Mail > Accounts > Add Account, and select Google. Enter your Google account credentials and follow the prompts to complete the setup. Once the account is added, your contacts, calendar events, and emails will begin syncing with your iPhone automatically.
Method 3: Use Google Drive for Additional File Transfers
For other types of files, such as documents, photos, and videos, you can upload them to Google Drive on your Android device.
Simply open the Google Drive app, upload the files you wish to transfer, and then download them to your iPhone by logging into the same Google account on your iPhone.
Keep in mind that a standard Google account comes with 15GB of free storage, so if you have more data to transfer, you may need to purchase additional storage or organize your files accordingly.
The Bottom Line
In a nutshell, transferring data from Android to iPhone after setup is easier than ever with the right tools. Whether you’re using the Move to iOS app during the initial setup or syncing data through your Google account after the iPhone has already been set up, these methods ensure a seamless transfer of your essential files, contacts, and media.
By following the steps outlined, you can switch between platforms without losing any important data. With preparation and the right process, transitioning to an iPhone can be smooth and hassle-free.
